
chatGPT를 이용한 워드프레스 블로그 글쓰기 완전자동화 #3
Pabbly Workflow 생성
Create Workflow in Pabbly
시나리오 고민하기
Considering a scenario
시나리오를 고민하는 이유는 Pabbly의 Workflow를 구성할 때, 실행시키는 Trigger와 Action들이 일관된 흐름을 가지도록 설계해야 하기 때문입니다. 시나리오를 고민하여 특정 이벤트에 따라 실행되는 Trigger와 이에 대응되는 Action들이 서로 잘 맞아 떨어지도록 해야 합니다. 이러한 고민 없이 Workflow를 구성하면 예상치 못한 문제가 발생할 수 있으며, 작업의 순서나 조건을 수정해야 하는 경우 전체 Workflow를 재구성해야 할 수도 있습니다. 따라서, 시나리오를 고민하여 미리 설계하는 것이 좋습니다.
The reason for considering a scenario is that when configuring the Workflow in Pabbly, you need to design Trigger and Actions that have a consistent flow. By considering a scenario, you ensure that the Trigger that is executed based on a specific event matches well with the corresponding Actions. Without this consideration, unexpected problems may occur, and you may have to reconstruct the entire Workflow if you need to modify the sequence or conditions of the tasks. Therefore, it is advisable to consider a scenario and design it in advance.
필자의 경우 아래와 같이 20단계로 시나리오를 구성하였다. 아래 시나리오는 많은 시행착오를 거쳐 pabbly credit 소비가 최소화 될 수 있도록 작성되었다.
In my case, I configured the scenario in a total of 20 steps. The following scenario was written after going through many trial and error steps to minimize Pabbly credit consumption
- 특정 시간마다 실행되도록 하기(기본이 15분이나, 조정가능)
Set to run at specific intervals (default is 15 minutes, but adjustable) - 신규 등록된 카테고리 가져오기
Fetch newly registered categories. - 카테고리 가져오기가 성공할 시 계속 진행
If fetching categories is successful, continue to the next step - 카테고리별 주제 생성
Create a topic for each category - 주제 생성이 성공할 시 계속 진행
If creating a topic is successful, continue to the next step - Airtable에서 데이터 가져오기
Fetch data from Airtable - 본문 HTML 문서 만들기
Create an HTML document for the content - 본문생성 성공 시 계속 진행
If creating the content is successful, continue to the next step - 본문 Markdown 문서로 변환하기
Convert the content to a Markdown document - 주제글에 대한 해쉬태그 생성하기
Create a hashtag for the topic title. - 해쉬태그 생성 성공 시 계속 진행
If creating the hashtag is successful, continue to the next step - 해쉬태그 공백 제거
Remove spaces from the hashtag - 본문 이미지 검색하기
Search for images for the content - 이미지 검색 API와 연동
Integrate with an image search API. - 이미지 최종 URL 추출
Extract the final URL of the image - 이미지를 성공적으로 가져왔을때 계속 진행
If the image is fetched successfully, proceed to the next step - 전체 DB 생성
Creating the entire database - 블로그에 자동 등록
Automatically write on the blog. - 전체 DB 정리
Organize the entire database - 트리거 초기화
Reset the trigger.
먼저 https://connect.pabbly.com 에 접속한 후 우측 상단의 “Create Workflow”를 클릭하여 새로운 Workflow를 만들어 준다.
First, access https://connect.pabbly.com, then click on ‘Create Workflow’ in the top right corner to create a new workflow

1. 특정 시간마다 실행되도록 하기
Set to run at specific intervals
Pabbly는 처음 어떤 조건일 때 시작될지(Trigger)와 액션(Action)들로 구성된다. 우선 Trigger를 1분마다 실행되도록 Pabbly에서 제공하는 타이머를 선택할 예정이다.
Pabbly is composed of Triggers and Actions that determine when it will start under certain conditions. First, we plan to select the timer provided by Pabbly to run the Trigger every 1 minute.
Choose App 화면에서 “Scheduled by Pabbly”를 선택하고, 개발 단계이므로 1분마다 실행되도록 아래와 같이 입력한다.
In the Choose App screen, select ‘Scheduled by Pabbly’ and enter the following to run every 1 minute, as it is in the development phase
| Name | Value |
| How often you want to run your workflow? | At regular intevals |
| Every | 1 |
| Time Span | Minutes |

다음, 아래의 + 버튼을 눌러 본격적으로 Action을 정의해본다.
“Next, press the plus (+) button below to define Actions in earnest.”
2. 글을 작성할 대상 Category 정보 가져오기
Fetch information about the target Category for creating a new post.
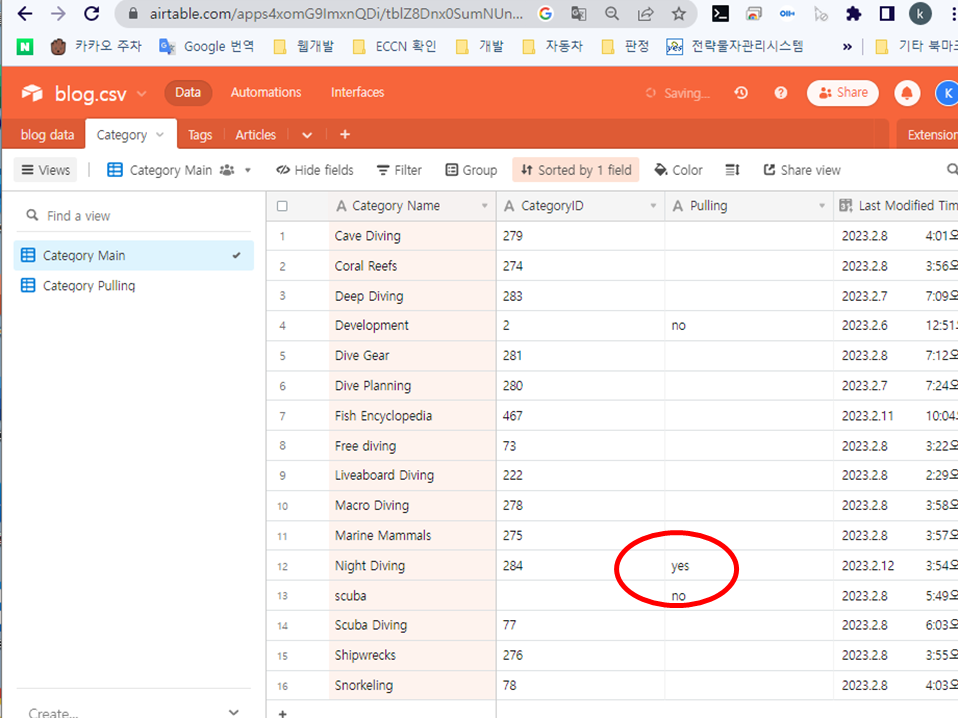
새로 글을 작성할 대상 Category를 검색하여 가져온다. 대상 여부는 Airtable의 Category 테이블의 Pulling 값이 yes 인 것만 가져오도록 한다. 필자는 테스트로 Night diving 카테고리의 글을 쓰기 위해 Pulling 값을 yes로 airtable에서 변경해 주었다.
Search and fetch the target Category for creating a new post. Fetch only the target Category with a ‘Pulling’ value of ‘Yes’ in the Airtable ‘Category’ table.
As a test, I changed the ‘Pulling’ value to ‘Yes’ in Airtable for the ‘Night diving’ category to write a post
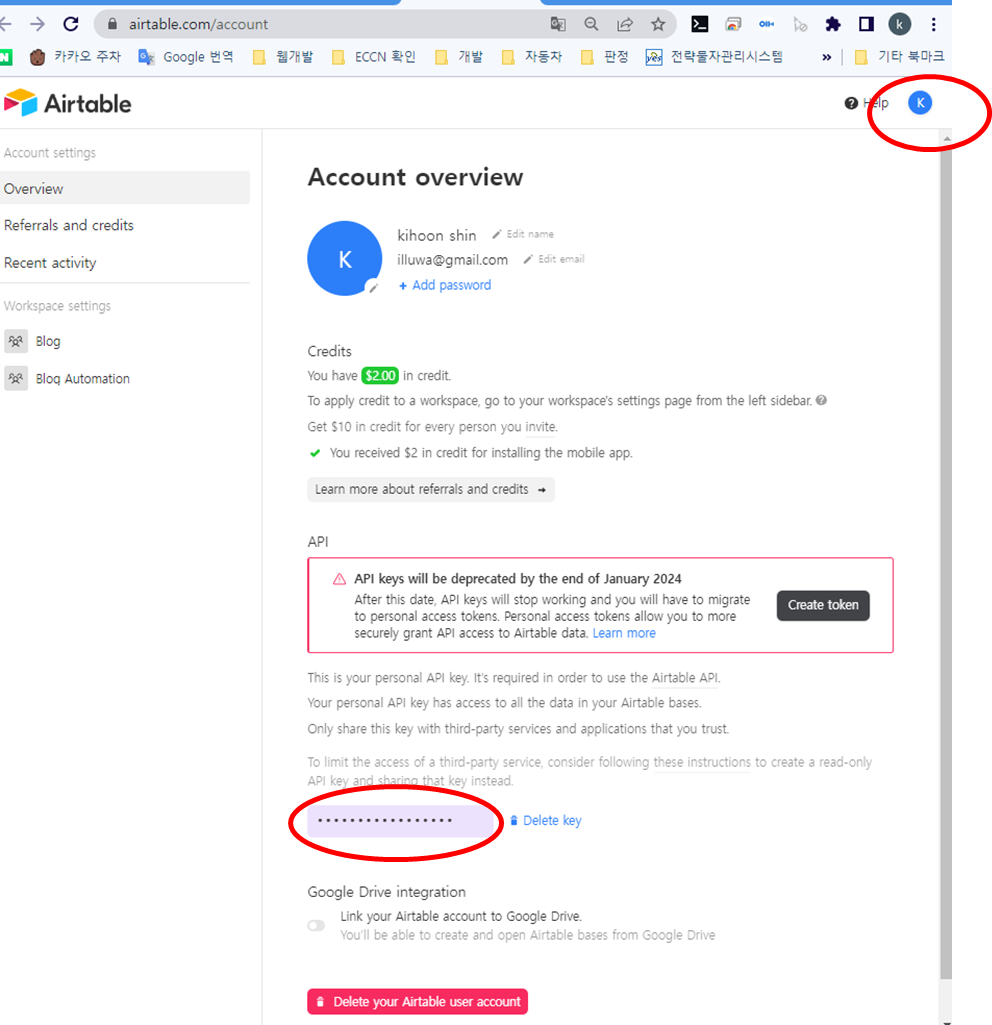
AirTable에서 정보를 가져오기 위해 “Choose App”에서 Airtable을 검색하고 , Action Event는 “Search Record”를 선택한다. 처음으로 작업할 경우 Airtable과의 접속 연결을 위해 API키를 요청받게 되는데 이는 Airtable에 로그인 후 우측 상단의 계정이름을 클릭하고, Account 메뉴로 들어가면 API 키를 생성할 수 있다.
To fetch information from Airtable, search for ‘Airtable’ in ‘Choose App’ and select ‘Search Record’ as the Action Event. If you are performing this task for the first time, you will be prompted to request an API key to connect to Airtable. To obtain this key, log in to Airtable, click on your account name in the upper right corner, and go to the Account menu where you can create an API key.
연결이 완료된 경우 검색할 조건들을 입력할 수 있게 된다. 본인의 경우 DB이름은 blog.csv, 테이블 명은 Category, 필드명은 Pulling 이므로 아래와 같이 입력하고 Save & Send Test Request 버튼을 클릭하였다.
Once the connection is established, you can enter the search conditions. In my case, the database name is ‘blog.csv’, the table name is ‘Category’, and the field name is ‘Pulling’, so I entered them as follows and clicked the ‘Save & Send Test Request’ button.
처음에는 yes/no 대신 checkbox로 구현코자 하였으나, pabbly에서 checkbox의 true/false 값을 제대로 가져오지 못하는 관계로 text 로 구현하였다.
At first, I tried to implement the ‘Pulling’ value as a checkbox instead of yes/no, but because Pabbly was unable to properly fetch the checkbox’s true/false value, I implemented it as text instead.

정상적으로 데이터를 가져왔다면 “Save & Send Test Request” 클릭시 아래 처럼 가져온 데이터를 보여준다.
If the data is fetched successfully, clicking on ‘Save & Send Test Request’ will display the fetched data as shown below

3.카테고리 가져오기가 성공했을 시 계속 진행
If fetching categories is successful, continue to the next step
Airtable, 네트워크 등의 문제로 데이터를 제대로 가져오지 못하거나, 가져올 데이터가 없을 경우 더이상 진행되지 않고 멈추도록 필터를 걸어주도록 한다. 필터 작업을 하지 않는 경우 오류가 난 상태로 계속 진행이 되어 pabbly 크레딧만 소비하게 된다.
To prevent Pabbly credits from being consumed when data cannot be fetched due to issues with Airtable, networks, or other factors, apply a filter to stop the process if the data is not properly fetched or if there is no data to fetch. Without filtering, the process will continue with an error, consuming Pabbly credits unnecessarily
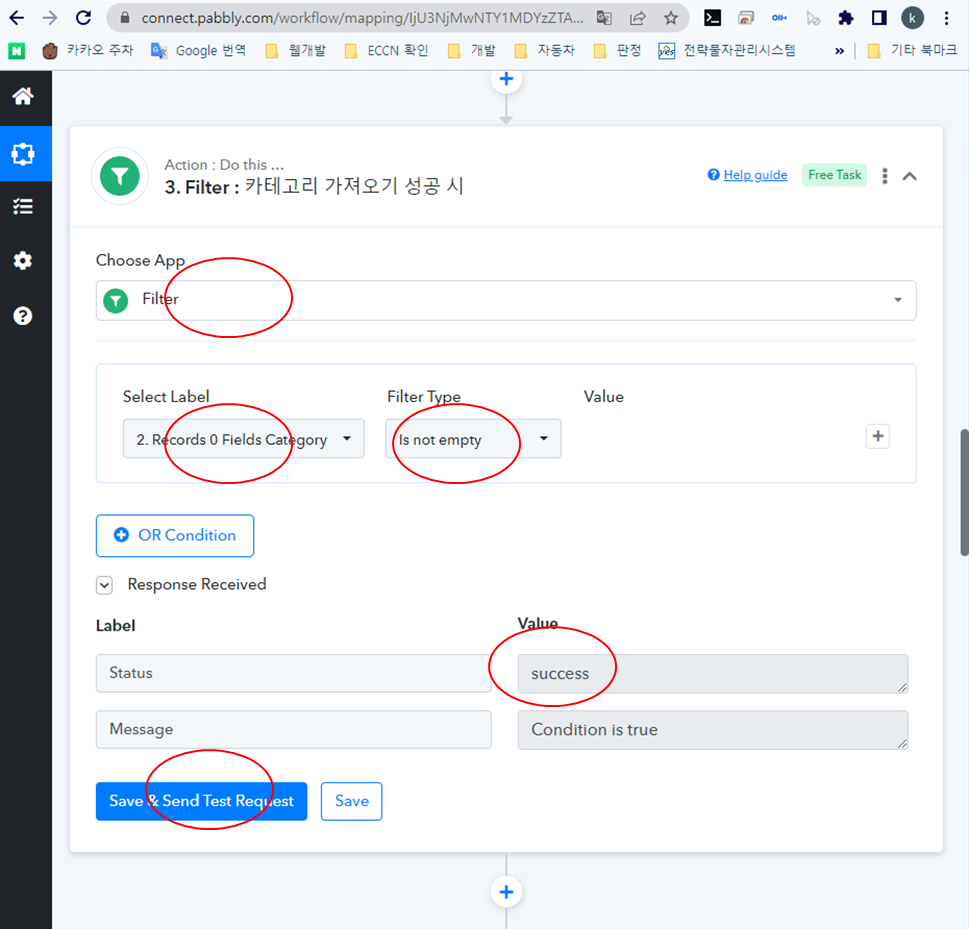
마찬가지로 + 버튼을 눌러 “Choose App”에서 “Filter”를 클릭하고, Select label에는 2번에서 가져온 카테고리 정보(Records 0 Fields Category)가 “is not empty” 할때문 success 하도록 선택하고 “Save & Send Test Request” 버튼을 누르면 성공 메시지를 볼 수 있다. 오류가 나는 경우에는 error 메시지를 출력하고 멈추가 된다.
Similarly, click the plus (+) button, search for ‘Filter’ in ‘Choose App,’ and set the Select label to ‘success’ when the category information fetched from step 2 (Records 0 Fields Category) is ‘not empty.’ Click the ‘Save & Send Test Request’ button to confirm that it succeeded. If there is an error, the process will stop and an error message will be displayed.
다음 글에서는 4. 카테고리별 주제 생성하기 부터 진행된다.
The next step in the process will begin from ‘4. Create a topic for each category
Your style is so unique in comparison to other folks I’ve read stuff from. Thanks for posting when you’ve got the opportunity, Guess I’ll just bookmark this site.